ESPtoy Documentation
(Version: 26 Feb 2018)
Copyright 2018 Burney Waring
Copyright 2018 Burney Waring
Installing ESPtoy
Basics of ESPtoy
ESPtoy Details
ESPtoy Cases
ESPtoy Construction
ESPtoy License
Contact Burney Waring
Using ESPtoy, The Basics
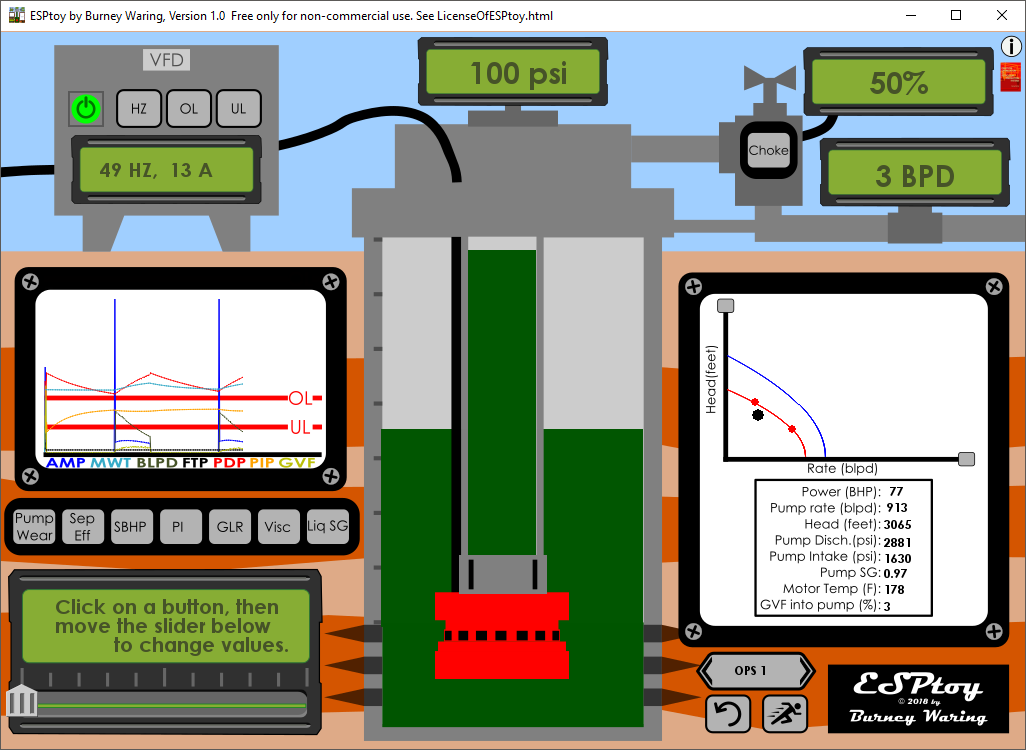
The interface shows a Variable Frequency Drive (VFD) in the upper-left corner. Click on the power button to start the pump. The button will turn green, showing that the ESP system is on. Turning on the pump also starts or resets the averaging of the surface meter, found near the top in the upper-right.
Tip: If you rapidly click the power button off and then on, you will restart the test on the surface meter to get a more accurate value without waiting.
In the middle of the top is the Flowing Tubing Pressure (FTP) gauge reading.
The casing, tubing and pump are shown in the middle of the interface. The pump is the red shape at the bottom-middle of the screen. The green fluids moving up and/or down represent the liquid levels in the casing and tubing. The left side of the casing is marked in 1000 ft increments from zero at the surface to 7000 ft at the pump and perforation depth.
To the right is a white box with a typical pump curve. The red curve is the actual pump curve, taking into account the fluids in this well and the current pump performance. The blue curve is the 'catalog' pump curve, made for a condition of fresh water and 60 hz frequency.
You can change the shape and values of the pump curve (simulating a pump redesign) by clicking on the small gray squares at the ends of the pump curve axes.
To the left is the ammeter chart, which by default shows curves amperage and certain additional values. Here is the legend for the curves:
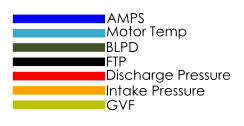
Tip: If you click the ammeter chart you can turn off all the curves but the amperage.
The chart also shows the overload trip level (OL) and the underload trip level (UL) that will cause the VFD to trip the power off to the pump. An electrical overload is never good. Note that when starting the pump, due to the inertia of the pump and motor, electrical inductance, etc., there is always a current spike. The VFD overload level ignores this.
Tip: If you set the OL to the maximum (200), ESPtoy will ignore checking for an overload. This can be fun for trying out extreme cases.
You will find a variety of ways that an ESP can have an underload (low amperage). One way is that the well pumps off and gas is drawn into the pump. The underload trip will shut the pump down and thus prevent motor overheating or other problems. If the pump trips on Underload, it will restart after a time. Conventional wisdom is that having a pump run and stop, run and stop for days or weeks will cause failure. ESP systems can be heavily loaded, structurally, thermally and electrically, so reversing these stresses often would most likely cause a failure sooner that later. Better to remove the condition, by for example reducing the production rate.
There are multiple green displays with values in them. In the upper-left is the one on the VFD that displays the electrical frequency (HZ) and the amperage (A). In the middle at the top is the flowing tubing pressure (FTP). At top-right is the percentage of the wellhead choke opening. Just below that on the right is the surface meter reading of liquid rate in barrels-per-day (BPD).
In the lower left is a green display with some text and a slider just below it. The text changes if you click on any of the gray buttons. There are 13 buttons (described below) that you can click to change the text and get access to changing the value associated with each gray button. Click on 'Pump Wear' for example. The text below it will change. Now drag-and-drop the slider below the display to change the Pump Wear value. The new value will appear in the bottom row of that green display. The ESPtoy simulated well will change accordingly. ESPtoy was built without the need to use a keyboard, just use your mouse.
Just above the pump is a gray rectangle. This is an optional check-valve to prevent fluids from running backwards through the pump, for example, when it is turned off. Some ESP wells have this and some do not. Click it to install or remove the check valve.
After making multiple changes you may want to return to the original ESPtoy values. You can click on the gray Reset button in the bottom right.
Occasionally, you may want to slow down the simulation speed. You can do this by clicking on the gray 'Running Speed' button in the bottom right.
Tip:You can pause the simulation by moving the slider all the way to the left. Clicking again will allow the simulation to move along slowly.
The Cases button in the bottom right just above the Reset button changes to Cases that are different from the default case.
In the top right corner, the Info button brings you to the first documenation page, ESPtoy README.html.
Just below the Info button is a tiny red book cover to bring you to the Amazon page for my book, Practical Optimization of Petroleum Production Systems.